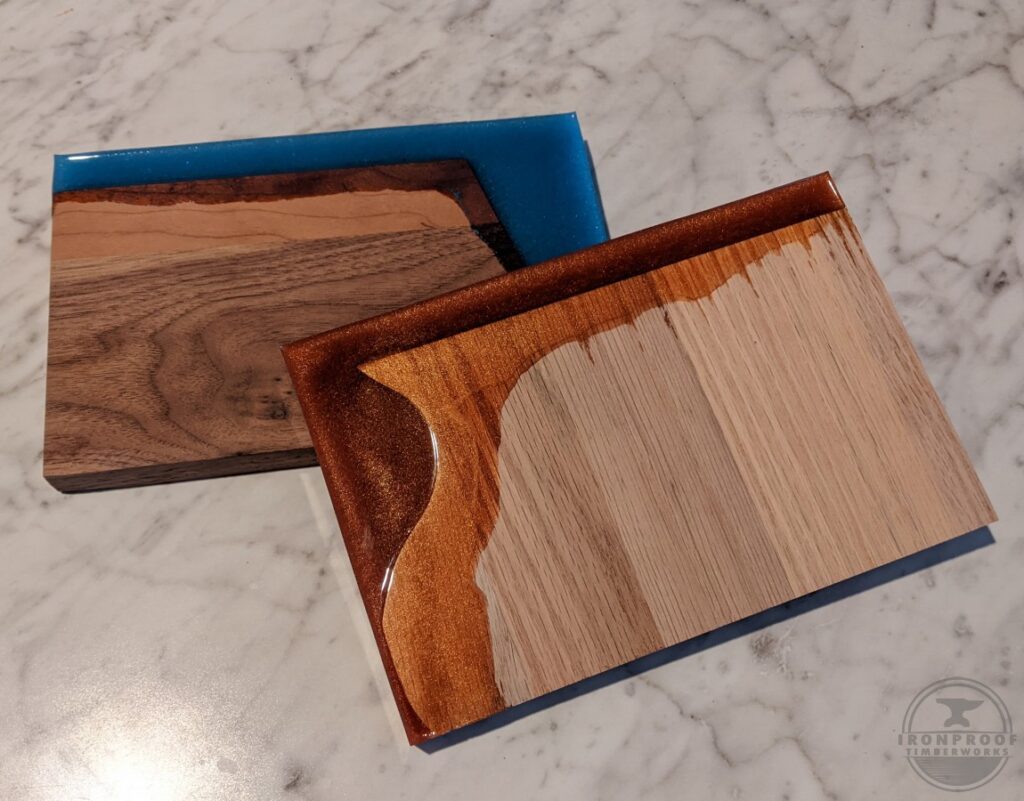
Okay okay…This epoxy pouring stuff is pretty neat. I had a few missteps and things I didn’t think about which I’ll note below. But the pour is fun! See Part 1 HERE
A couple of weeks back I decided to dip my toes into the “epoxy pool” and try out a couple of small projects. I ordered a few supplies (which I’ll recap below) and made some simple plans on what to execute.
Things I gathered & planned:
- Food Safe Epoxy (I opted to use one with decent reviews call Superclear Table Top)
- Color Flakes (I chose a mini sampler pack so I could go mild or wild)
- Mixing Cups / Homemade Mixer
- Latex Gloves
- Silicone Pour Mold (9″ long by 6″ wide by 2″ deep)
- Mini Torch (I already owned this but having one is key for releasing bubbles)
- Flat Level Workspace with an ambient temp of around 65-70 degrees
- Wood Pieces as the project base (I chose oak and a cherry/walnut glue-up)
I started first by rough cutting the wood. Each pieces was approximately 9″ long by 6″ wide (to keep epoxy use to a minimum) and then I “creatively” trimmed out an angle and a shape (seen in the picture below). After the wood was prepped I moved onto the silicone mold. It was clean, dry and ready to rock.
I laid my first piece of wood into position, placed a brick on top (so it wouldn’t inadvertently float) and moved to the actual epoxy phase. Right off the bat I made two beginner mistakes. ONE – have a metal mixer that is EASILY cleaned and attaches to your drill. I put together a homemade mixer with a wooden dowel and some screws and it was a messy piece that just ended up being tossed (epoxy is sticky!). So a simple metal mixer is key. TWO – disposable cups. I had the fancy measure cups which just ended up getting tossed as again, epoxy is sticky. Red solo cups might work really well here pending your pour volume.
I mixed the epoxy 1:1, added in some tastefully chosen metal flakes and spun away. I poured into the open void in the silicone mold, cleaned up and monitored a handful of times for the first hour or so. Anytime I saw bubbles in the epoxy I went over it very lightly with the mini torch. This released all the bubbles and made things look smooth as glass again.
After 24 hours I popped the piece out of the mold and have put it someplace safe so it can fully harden for around seven days.
I repeated this process with the cherry/walnut glue-up piece and a different colored epoxy for contrast. It’s possible I added too much flake, but some of the sparkle is fun (at least my tiny human thinks it is 🙂 ).
Once fully hardened after about 7-10 days I’ll plan to mill everything flat, trace out a charcuterie board design, cut out with a jig saw or scroll saw and then get to work finalizing and finishing. Stay tuned for part 3!
